"Ohhh Brother...Where Art Thou?"
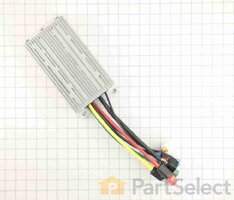
I probably need some assistance and advice here from @Blckshdw right now to ...Talk Me Off The Ledge... about the need to completely replace the Four Lead Acid 100 Amp-Hour Batteries loading up the Under Tray of my Ryobi RM480E Electric Riding Lawn Mower...that DIED SUDDENLY... just after making a Dual Blade Swap...with... New Lithium Ion Phosphate Batteries that weigh only 1/3rd of the OEM Lead-Acid Batteries and can last as long as 10 Years if installed and maintained correctly. THIS deal from Amazon seems to provide the MOST Bang 4 The Buck and includes all three new components that will allow this transition to occur... all for around $1,210.00:


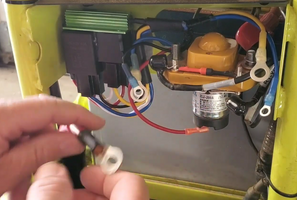
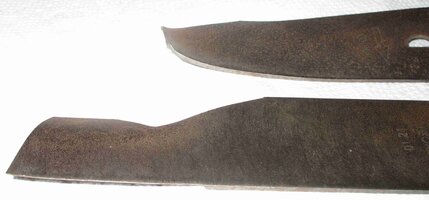
Oh... the other things I discovered about this Ryobi Model# RM480E Mower is that the Electric Motors driving the Two 20" Blades have ENORMOUS Power... Power enough to Tear the Tip Off of the End of One of the Blades ...after I struck a Cast Iron City Water Access Cover hidden along my sloped front easement area. THIS was a Big Surprise and it explained why the Mower was "Shaking Like a Chihuahua Pooping a Peach Pit". And since the Ryobi Manual fails to mention THIS... the Proper Tire Pressure should be right at: 20 PSI:
Best Ever Ryobi OEM Dual Blades R&R Step-By-Step Instructions:


I probably need some assistance and advice here from @Blckshdw right now to ...Talk Me Off The Ledge... about the need to completely replace the Four Lead Acid 100 Amp-Hour Batteries loading up the Under Tray of my Ryobi RM480E Electric Riding Lawn Mower...that DIED SUDDENLY... just after making a Dual Blade Swap...with... New Lithium Ion Phosphate Batteries that weigh only 1/3rd of the OEM Lead-Acid Batteries and can last as long as 10 Years if installed and maintained correctly. THIS deal from Amazon seems to provide the MOST Bang 4 The Buck and includes all three new components that will allow this transition to occur... all for around $1,210.00:
Oh... the other things I discovered about this Ryobi Model# RM480E Mower is that the Electric Motors driving the Two 20" Blades have ENORMOUS Power... Power enough to Tear the Tip Off of the End of One of the Blades ...after I struck a Cast Iron City Water Access Cover hidden along my sloped front easement area. THIS was a Big Surprise and it explained why the Mower was "Shaking Like a Chihuahua Pooping a Peach Pit". And since the Ryobi Manual fails to mention THIS... the Proper Tire Pressure should be right at: 20 PSI:
Best Ever Ryobi OEM Dual Blades R&R Step-By-Step Instructions:
Attachments
Last edited:

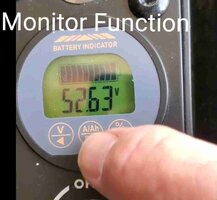
 I had all the same goodies on a wishlist, and the only thing that kept me from pulling the trigger, was spending a few dollars on a load tester and checking all of my SLA batteries individually. Turns out that 1 of my batteries had died, the other 3 were still good, so I replaced that one, instead of all 4. Bought me some time.